A GeoImage is a high resolution 2D image of a volume or a colour blend
In this example we will export a GeoImage from a GeoTeric analysis and import it into a Petrel project.
To export a GeoImage in GeoTeric there are different options depending on what the data source is.
- For z-slices or data mapped horizons use the "Export GeoImage" option in the Tools menu of the 2d slice viewer. For blends, use the 2d colour blend viewer.
- For attributes generated in the IsoProportional Slicing tool and displayed on horzions, the option to export is available as a right-click option in the project tree.

When you select the option to export a GeoImage you will see a preview of the image captured.
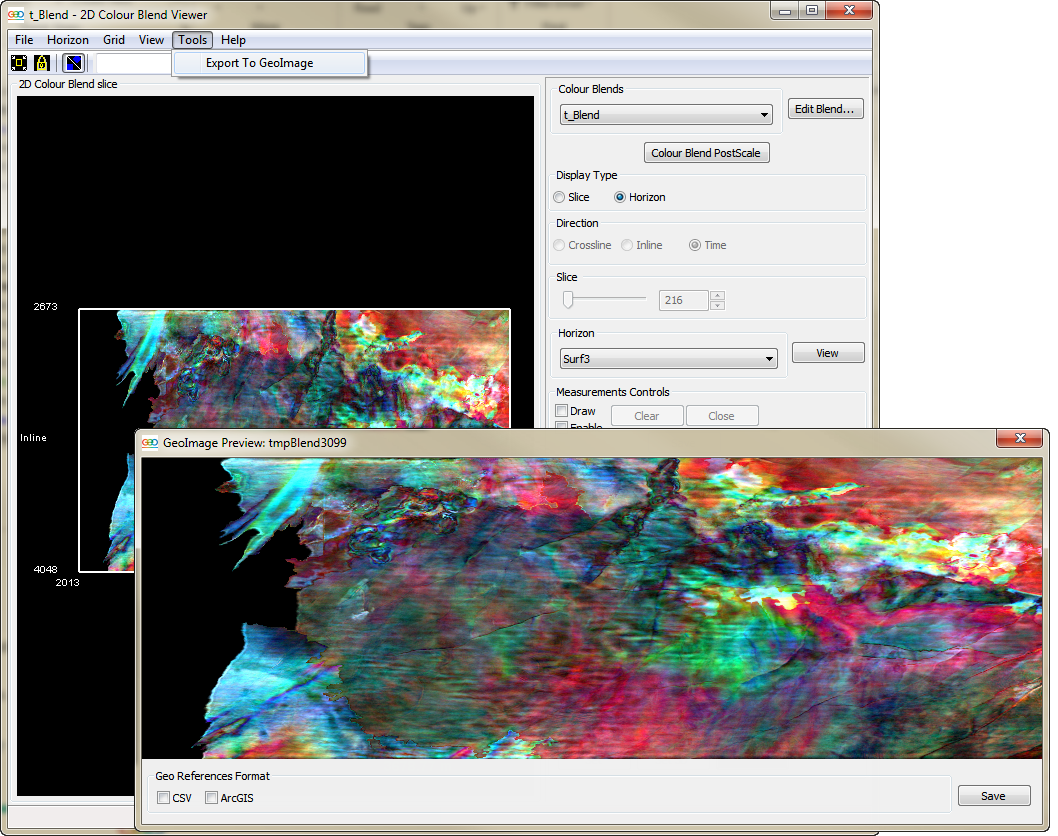
The GeoImage in the preview window has no scaling so it may appear differently to the image shown in the 2D slice or 2D colour blend viewers.
Before you save a GeoImage you must first select the format for the co-ordinates file that will be generated with the GeoImage. You have the option of a .csv file or an ArcGIS formatted file. Choose one format (or both) then click the save button. Choose a location and save the GeoImage (the formats available are BMP/TIFF/JPEG/PNM).
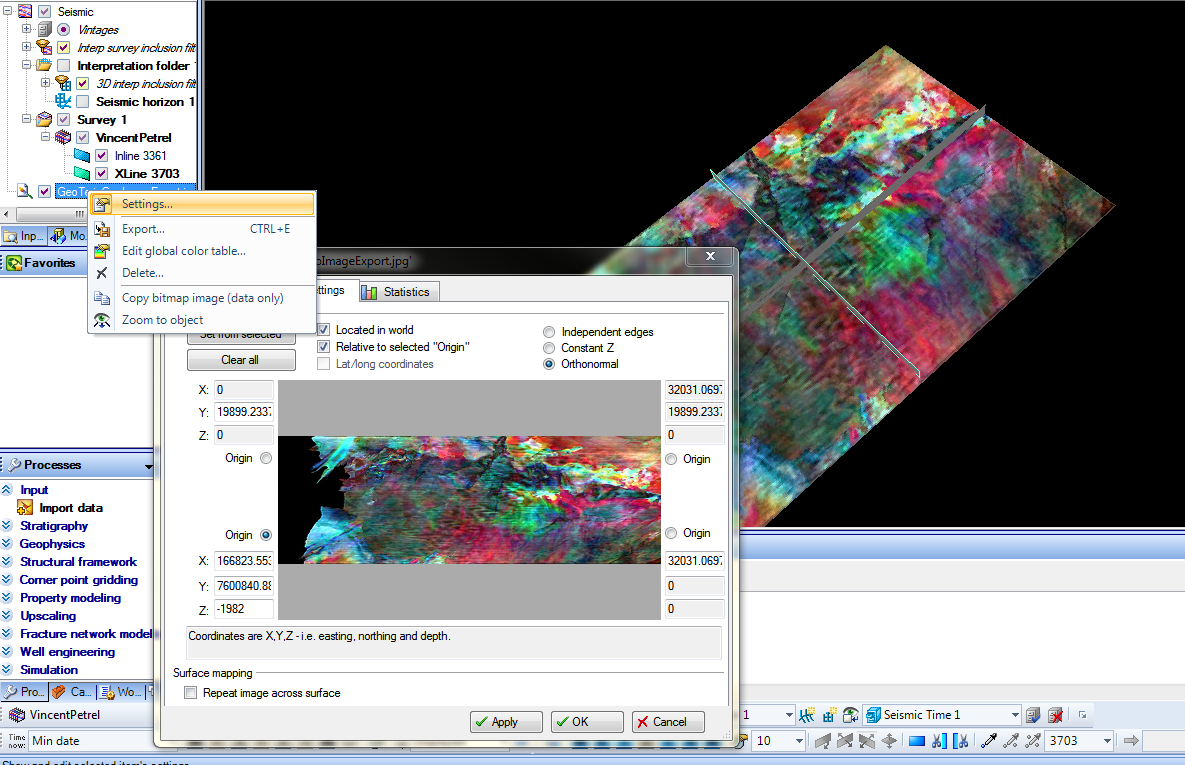
With your project open in Petrel
- Select the Import file > Bitmap image option from the file menu. Choose the GeoImage and select open, the GeoImage will be added to the Petrel project. You cannot view it yet as survey co-ordinates have not been set for the image.
- Right click on the GeoImage in the project tree and choose the settings option.
- Go to the Settings tab and tick the "Located in world" option.
- You can now manually enter the co-ordinates or you can highlight the survey in the Petrel project tree and click the Set from selected button to use the survey values.
- Remember to manually adjust the Z value (Petrel assumes that the default Z value is at the bottom of the survey) then click the Apply button and you will be able to visualise the GeoImage in Petrel.