The blog post this week will show how we can manipulate the data values in a volume with specific emphasis on how this can be applied to geobodies.
If we have a volume with a set of segmented geobodies created using the ‘ body labelling ’ process ( ProcessesandWorkflows: Processes>Geobodies>BodyLabelling) ; these bodies will be assigned different data values across the dynamic range of the data type based on their size. The largest bodies will be given the highest data values and the smallest the lowest values. If we are interested in a particular body/bodies we may want to isolate this from the set of geobodies, and also we may want to assign it a particular data value so it is a more user friendly number for application of additional workflows or to be used in modelling software. We will use an example containing channel geobodies, shown below.
Figure 1. Example Frequency decomposition blend highlighting channels of interest (above). Simple volumetric geobody extraction (below).
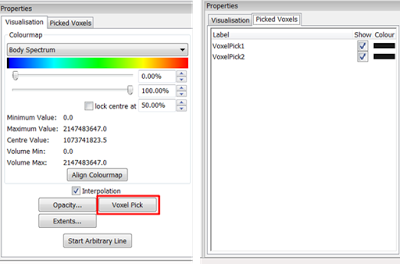
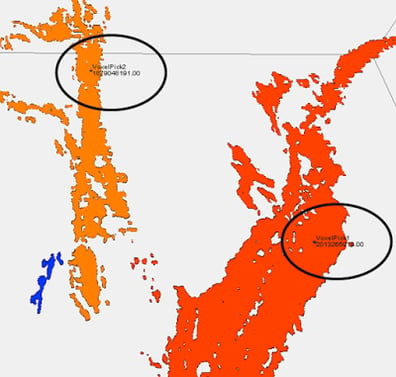
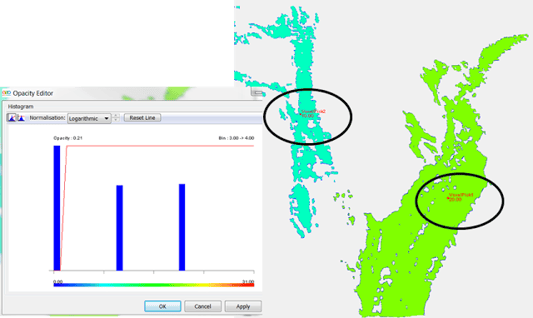
The first step to being able to make changes to these values is to identify the specific numerical value of the body or bodies of interest. This can be achieved by using the ‘voxel pick’ tool found in the properties box for any visualised volume. By making a voxel pick onto a body of interest in the main 3D window the numerical data value for that picked voxel, (and hence the whole body in this case), will be displayed.
Figure 2. Properties box for making voxel picks (above) and Two bodies of interest with voxel picks made to identify their data value (below)
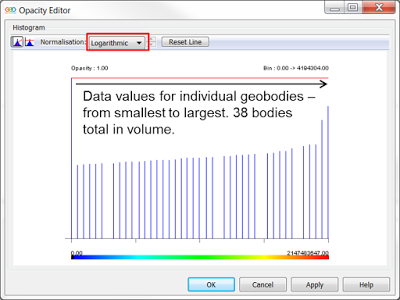
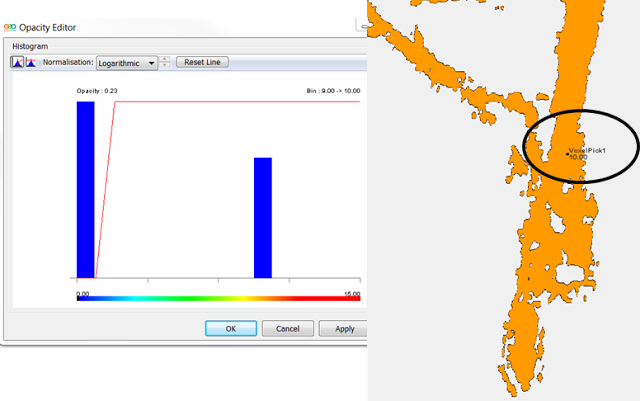
We can see the spread of the data values of the volume in the histogram, opened using the – Opacity tab and switching the histogram display to logarithmic display.
Figure 3. Histogram for volume in opacity editor
Once we know the data value(s) of interest we can use the Parser (ProcessesandWorkflows: Processes>VolumeMaths>Parser) to apply syntax to adjust the values. Below are a few common examples of where this can be beneficial and an example parser equation to carry out the function. All examples use a geobody volume created using the body labelling process as input (im1).
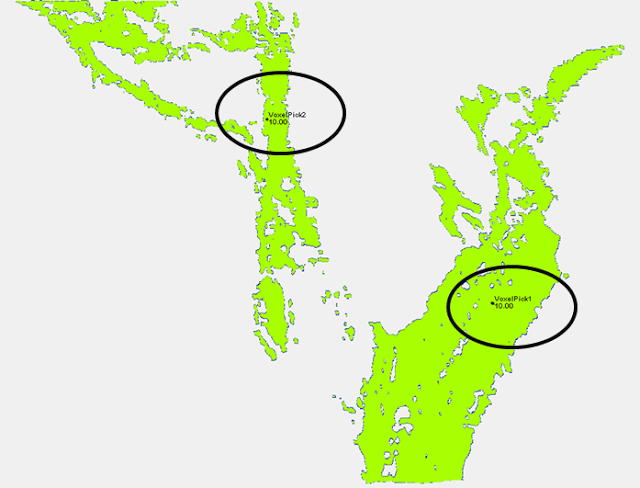
1) To change value of a specific body to a desired value , e.g. for input into modelling software which requires certain values.
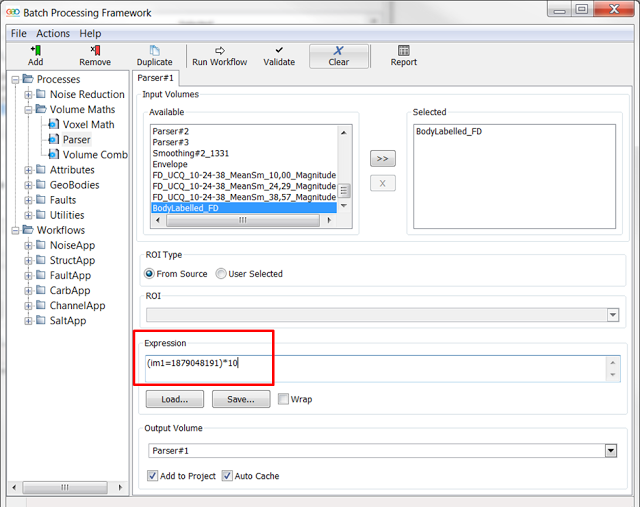
(im1=n1)*10
Where image 1 value is equal to n1 set its value to 10
Figure 4. Parser showing syntax to be applied to volume (above). Resulting geobody and corresponding histogram (below)
2) To isolate one or more bodies
(im1=n1)*10 + (im1=n2)*20
Where im1 value is equal to n1 set it to 10; where im1 value is equal to n2 set to 20; all other values will be set to zero. This will create a volume with 3 values – 10, 20 and zero (background).
3) To give several bodies the same data value
(im1=n1)*10 + (im1=n2)*10 + (im3=n3)*10
Where im1 value is equal to n1 set it to 10, w here im2 value is equal to n2 set it to 10, w here im3 value is equal to n3 set it to 10.
4) To change values for groups of bodies
(im1>n1)*10
This will set all bodies above the n1 threshold to a value of 10.
Note: These techniques can be useful for adjusting data values of seismic facies classification volumes created in the ‘Interactive Facies Classification (IFC+) module.
For more information on the parser please refer to the help files which contain detailed information on application of syntax and examples of different uses.
.png?width=486&name=Fig1%20(1).png)
